The tool
MODEL-1 indicator
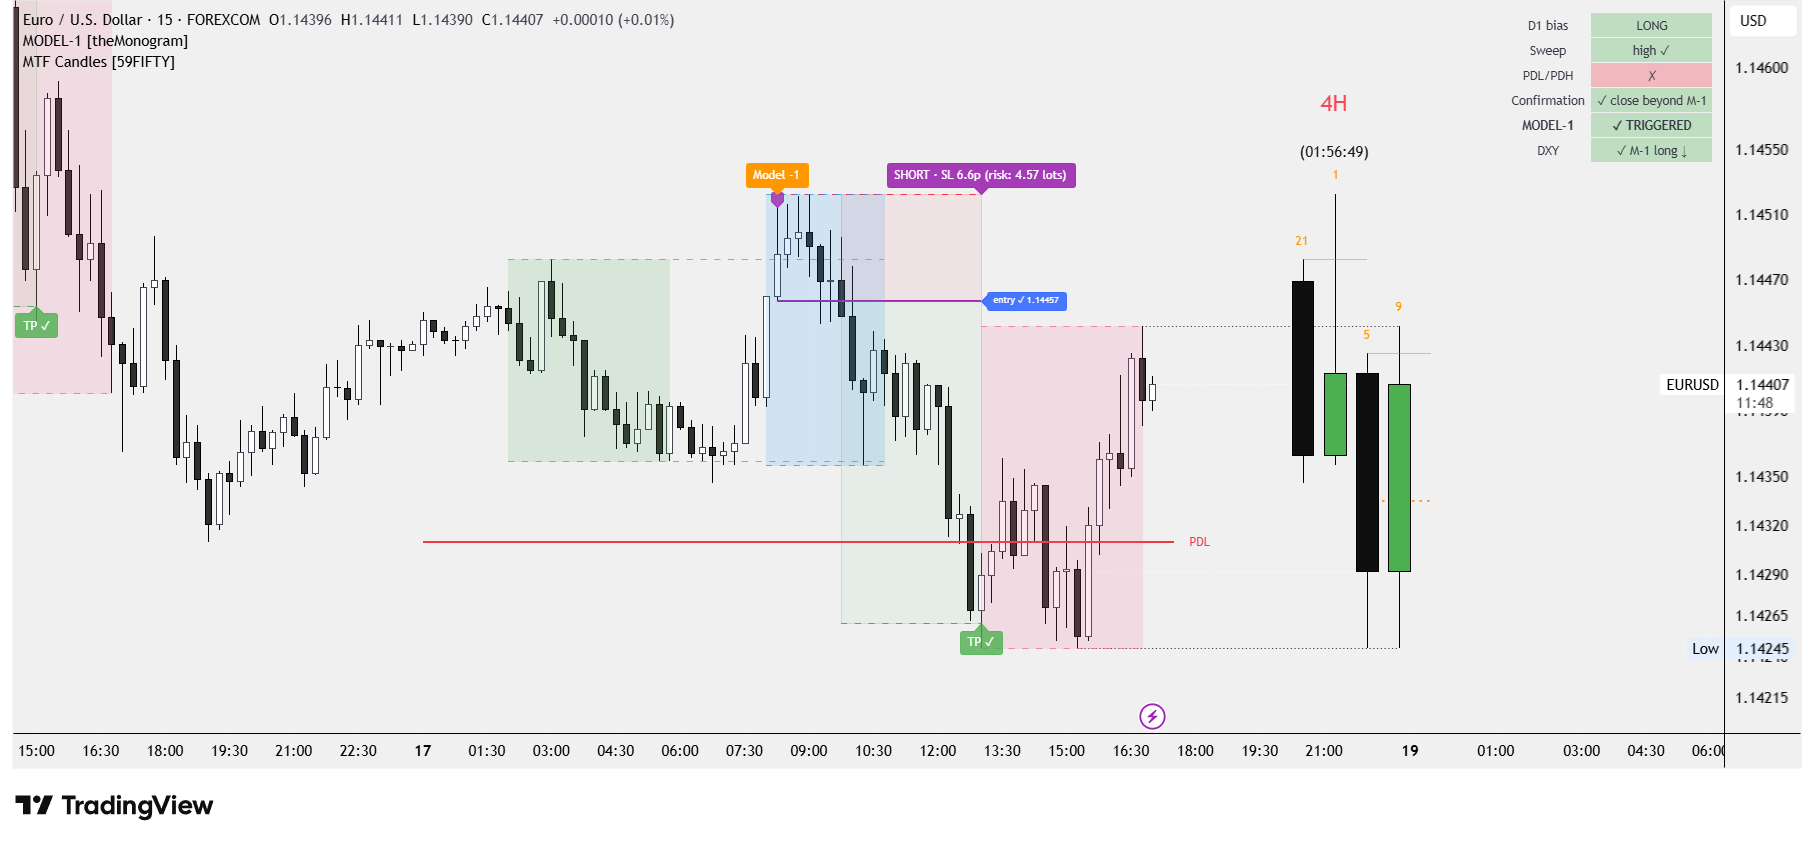
The tool the whole model runs on. It doesn't hunt trades for you — it takes the mechanical CRT Model 1 rules and grades every setup as it forms. The top block reads the signal itself, the bottom block reads the context around it.
I don't run Model 1 from memory — I'm building a custom TradingView indicator for it. It draws the sessions, the sweep, the Model 1 level, entry, stop-loss and target, and above all it keeps a checklist: D1 bias, sweep, PDL/PDH, confirmation, trigger and DXY confirmation. If the checklist isn't lit, there is no trade. For now it's an internal tool — I document its development alongside the journal.
How I work with it
- 01
Before the session: the checklist in the corner of the chart shows the D1 bias and the state of liquidity — preparation takes minutes.
- 02
During the London killzone: the indicator marks the sweep, the Model 1 level and the confirmation; entry, stop and target are drawn exactly by the rules.
- 03
After the trade: the TP ✓ / SL ✗ markers turn a screenshot into a ready-made record for the journal and a case study.
Sweep → Confirmation → Trigger → Context
How to read the dashboard
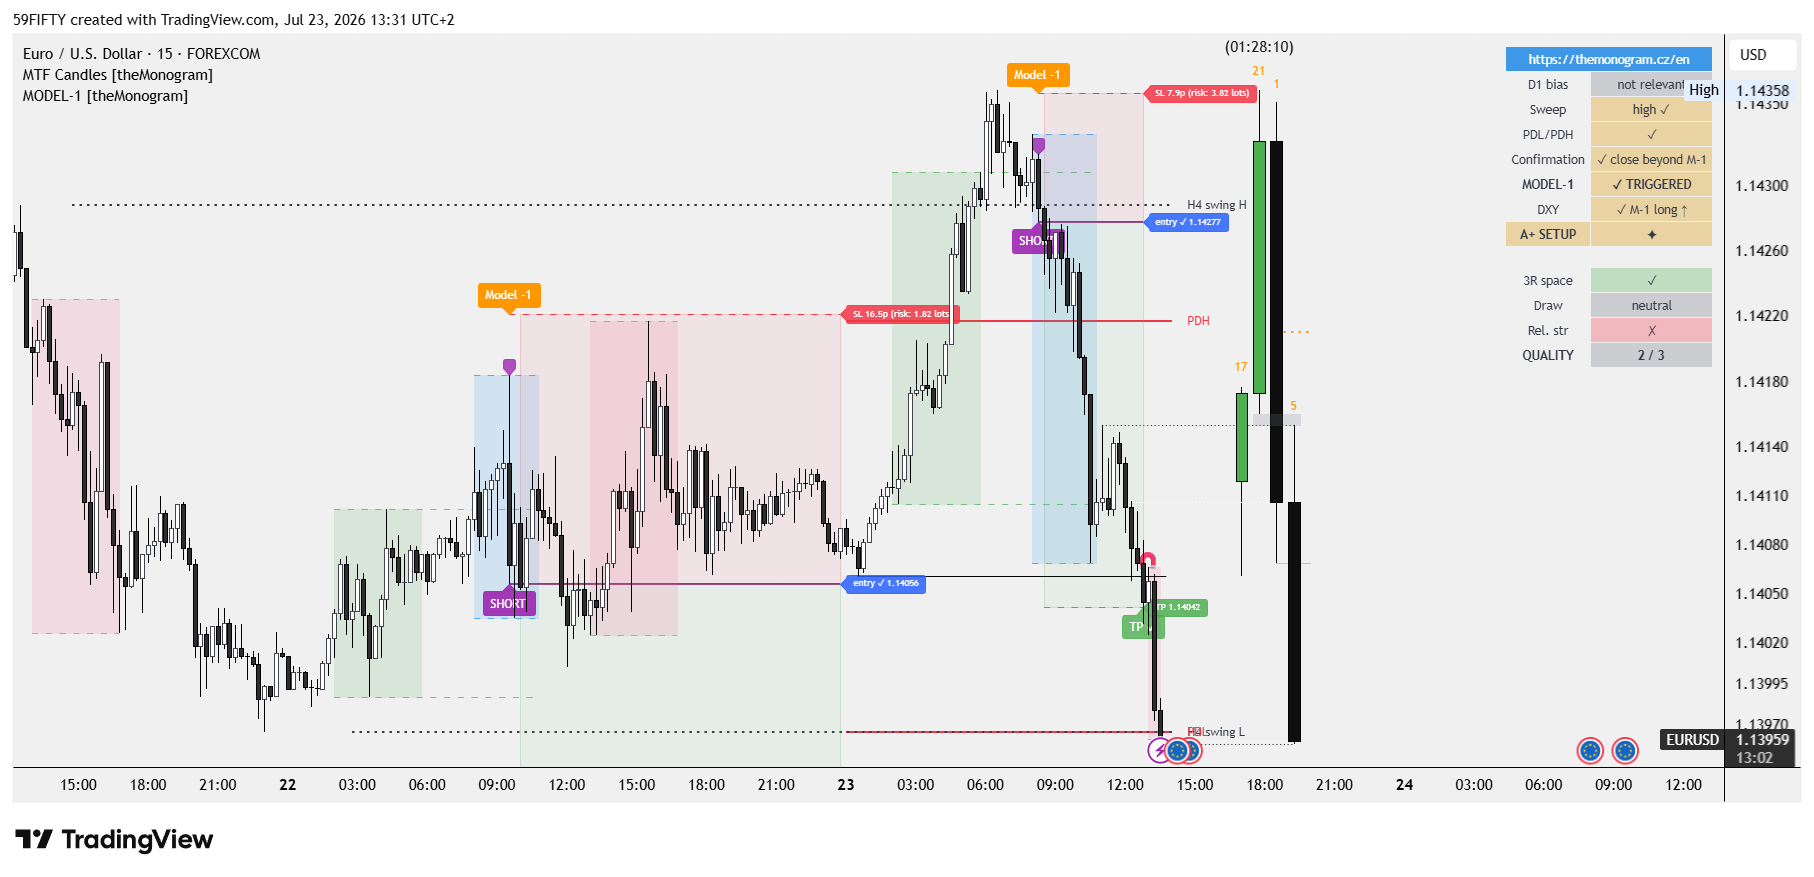
Read it top to bottom. By the time MODEL-1 says TRIGGERED, every row above it has already been decided.
Core signal
- 1
D1 bias
Daily trend filter — daily close against its 20-period average. It greys out to “not relevant” when DXY already confirms the direction. Green supports the trade, red argues against it.
- 2
Sweep
Which side of the Asian range price took. “low ✓” means the Asian low was swept — a long setup. “high ✓” means the Asian high went — a short. This row sets the direction everything else is judged against.
- 3
PDL/PDH
Did that same sweep also take the previous day's low or high? Clearing prior-day liquidity makes the setup meaningfully stronger.
- 4
Confirmation
Did a candle close beyond the Model-1 level — the far edge of the sweep candle? That close is the cue to place the limit order.
- 5
MODEL-1
The trigger itself. “limit @ M-1” means confirmed and waiting for the retest. “✓ TRIGGERED” means the retest filled and the trade is live. It turns grey — “TRIGGERED (filtered)” — when the context score below is weak.
- 6
DXY
Dollar-index confluence. The dollar is the quote currency, so a short needs DXY rising and a long needs it falling. The mirror Model-1 on DXY has to confirm the opposite direction to the trade.
- 7
A+ SETUP
Lights up gold when every row above it is green. It grades the signal only — deliberately separate from the context block below, which is why A+ and a middling quality score can appear together.
Context
- 8
3R space
Is a 1:3 target realistic against actual liquidity? Risk is entry minus stop; the target is three times that. ✓ when the target sits inside the furthest opposing pool — prior day, today, H4 swing, Asia or weekly extreme. ✗ when it overshoots everything on the map.
- 9
Draw
Where liquidity is pulling price. Only the prior-day low taken → UP, which favours longs. Only the prior-day high → DOWN, favouring shorts. Both or neither → neutral. It turns red when the draw points against the signal.
- 10
Rel. strength
Relative strength against the other major — EURUSD against GBPUSD — measured from the daily open. The cleaner trade is shorting the weaker pair and buying the stronger one; this row flags when you are doing the opposite.
- 11
QUALITY
How many of the three context checks passed. Two or more failures downgrade the trigger to “TRIGGERED (filtered)” — the signal was valid, the surroundings were not.
Colour code
- Gold — core signal complete (A+)
- Green — check passed, supports the trade
- Red — check failed, argues against it
- Grey — neutral, waiting, or filter off
What this is
A decision-support tool, not signals. The dashboard grades a setup against mechanical CRT rules; the final call is discretionary. Every filter can be switched off individually, so its effect can be measured rather than assumed.